
What You'll Need
-

Measuring Tape
-

Pencil & Level
-

Utility Knife
-

Squeegee (supplied)
-

Ladder


Important Installation Tips
Hanging Your Wallpaper Panels
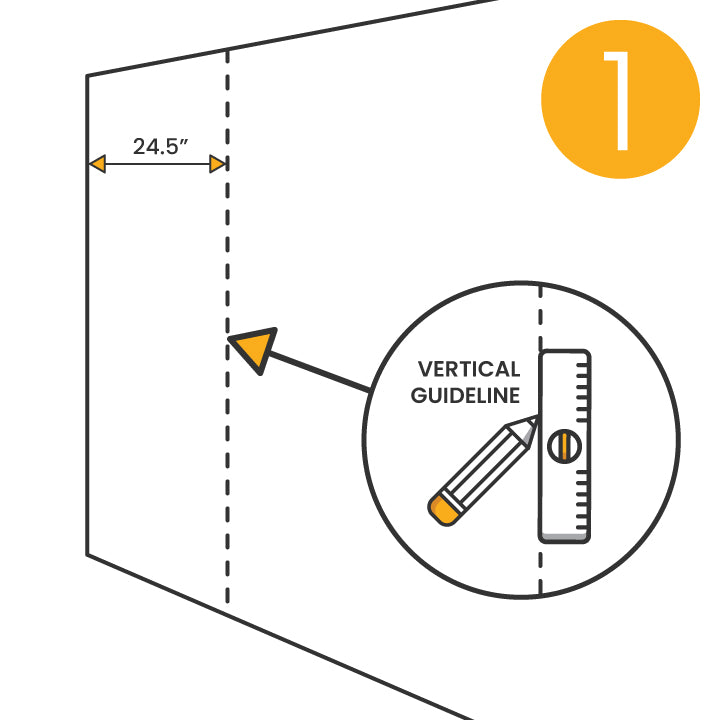
Step 1
Starting at the edge of the wall, use your level and a pencil to draw a straight vertical line a panel’s width minus ½” down the entire wall. Since wall corners are often not perfectly square, this overlap will help account for any variations in your wall. The excess wallpaper will be trimmed off once it’s fully installed. The vertical line you draw with the help of your level will act as a guideline to which to align your first panel, ensuring it is applied straight.
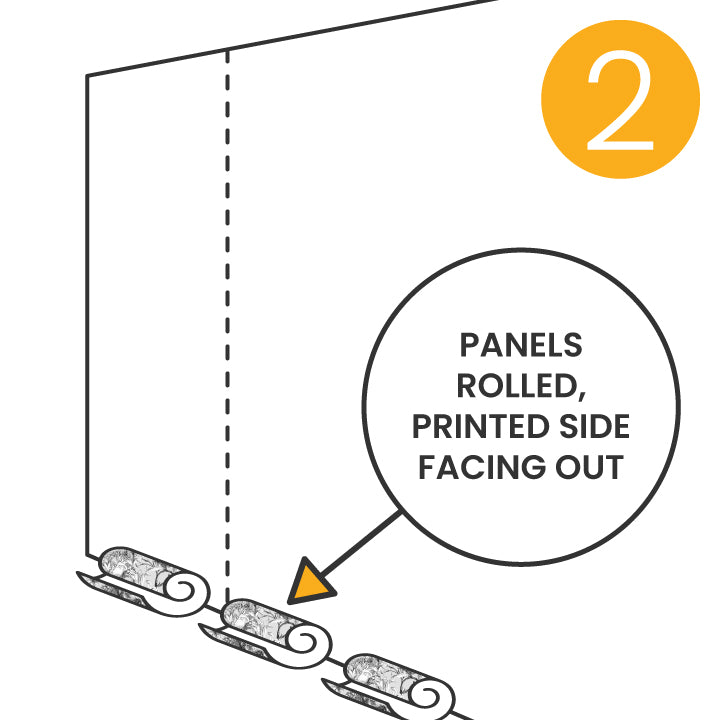
Step 2
Lay the individually rolled panels on the floor, along the wall, with the printed side facing out. If your pattern repeats every 25", all panels are labeled ‘1’ and can be installed in any order. If your pattern repeats every 50", the panels are labeled ‘1’ and ‘2’ and should be installed in sequence (i.e. 1, 2, 1, 2, and so on.). There will likely be excess overlap on the last panel. This extra material can be trimmed off later. TIP: Since the panels overlap by ½”, you can hang your wallpaper left to right, or right to left. For example: when applying wallpaper to the left wall, hanging the panels from right to left is recommended. Conversely, for the right wall, hanging from left to right will minimize seam visibility as you enter the room.
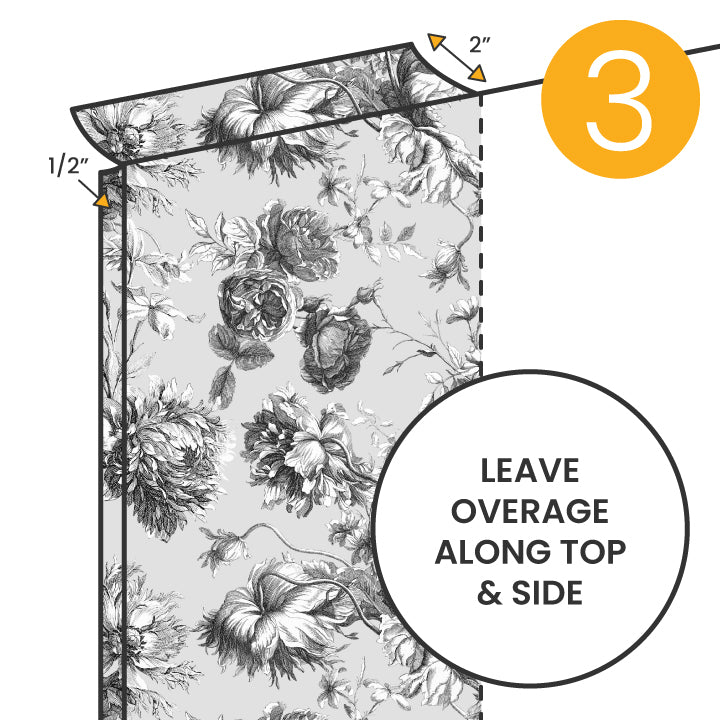
Step 3
Peel back approximately 18” of the backing from the top portion of your first panel, then gently adhere it to the wall. Ensure alignment with the vertical guideline previously drawn, with the assistance of your helper. Make sure to leave approximately 2” of overage along the ceiling line and a ½” overlap on the corner. This excess material will also be trimmed off later.
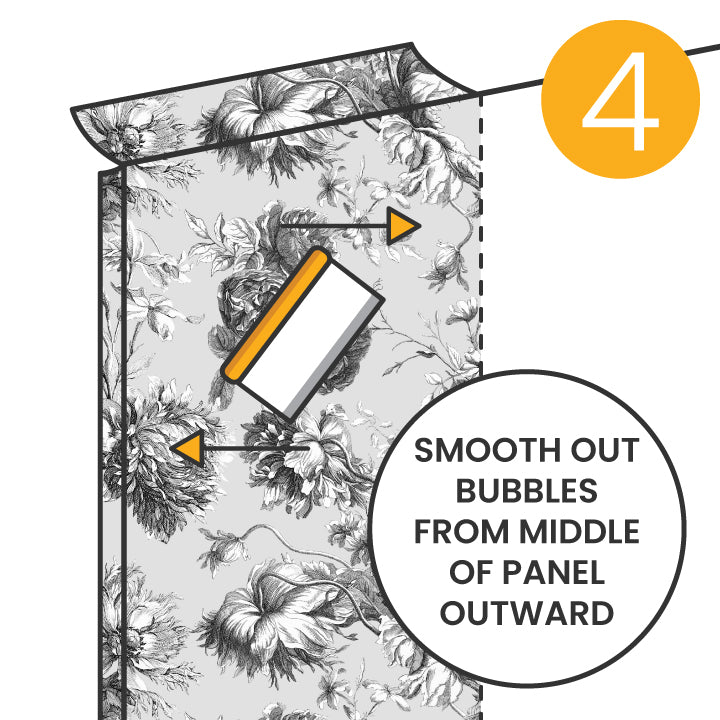
Step 4
Use your squeegee to carefully smooth out bubbles and creases, working from the upper-middle of the panel outward. Regularly verify alignment with the vertical guideline, with the assistance of your friend. Readjust the panel if needed. As your friend gradually peels off the backing and moves down the wall, continue the process of smoothing out bubbles and creases. Once the first panel is flawlessly positioned, you can rest assured that subsequent panels will align perfectly!
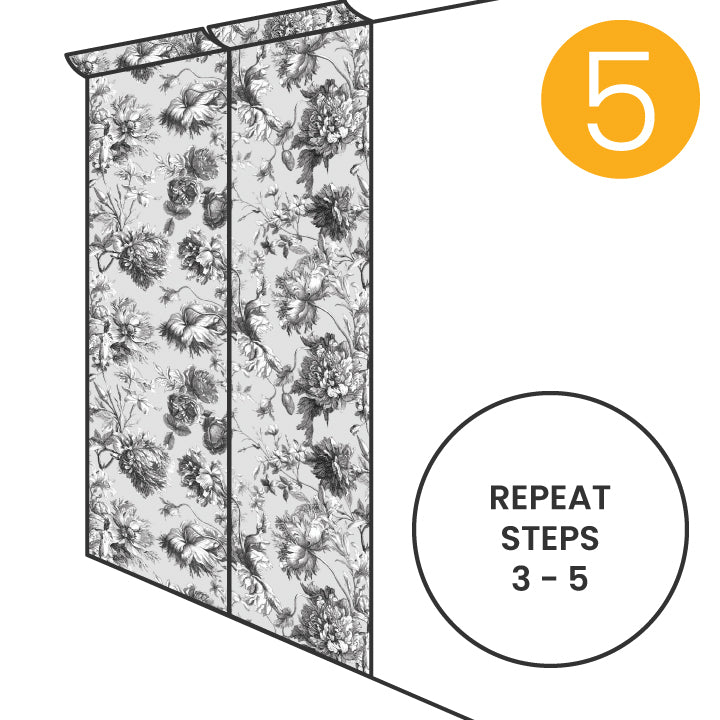
Step 5
The panels are designed to overlap by ½”. Align each panel by matching up the image to the previously installed panel, working your way from top to bottom. If you’re having difficulty aligning the pattern, gently remove the panel, reposition and try again. Once the image is aligned, you can smooth out the panel with your squeegee. TIP: Before removing the backing, dry fit each panel to ensure you know how it should align to the previous panel. Repeat steps 3 through 5 for all remaining panels.
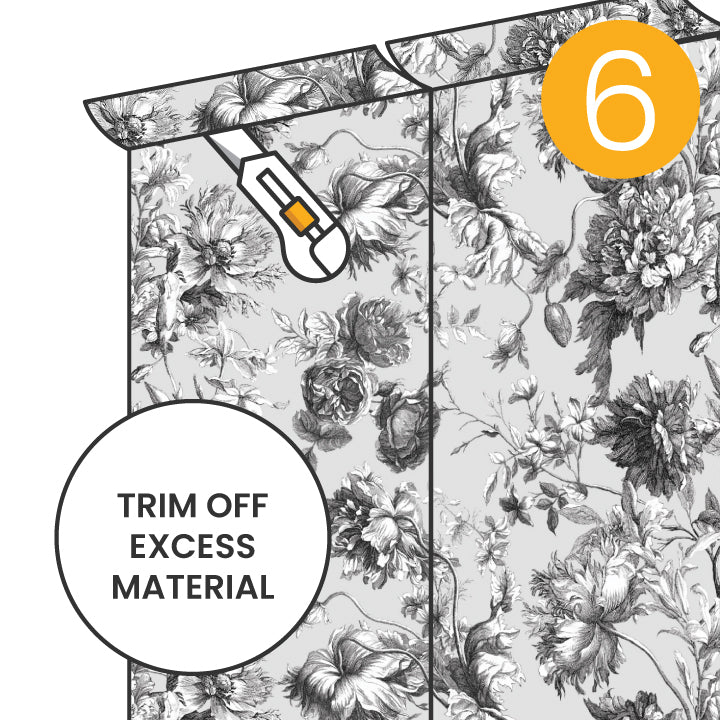
Step 6
Once you have installed the entire wallpaper, trim off any excess material using a utility knife, snapping off a fresh blade approximately every 8’. This will ensure a nice, clean edge. We recommend changing the blade frequently to avoid tearing the wallpaper. When trimming, make long evenly pressured cuts without lifting the blade. If you’re not comfortable trimming your wallpaper free-hand, a straight edge such as a level, the squeegee, or large ruler can be used as a guide.
